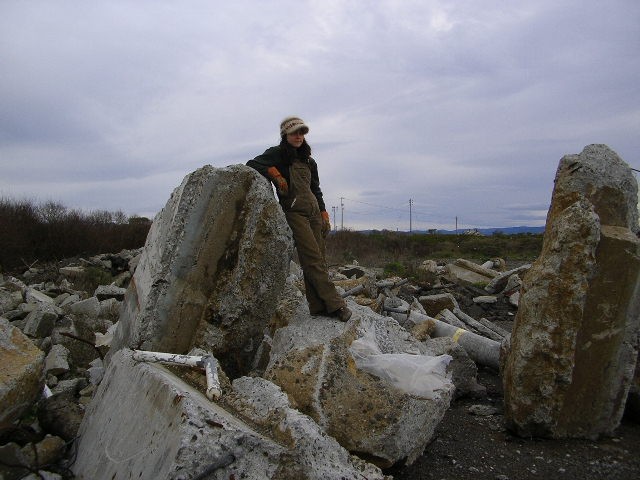
Liz poses at the Urbanite Resource Site
So where can you get the things you'll need to build your oven? Most of the stuff like shovels and hammers you can find at a hardware store, or sometimes borrow from friends. Other oven ingredients may require some more sleuthing. As a general rule, the closer the resource the better.
In addition to just getting the materials together, they need to be prepared. We grated and soaked a lot of clay, sifted a lot of sand, and grated a lot of manure ourselves, but also had a lot of this done during the educational work parties.
Looking for costs? Consider checking out our oven materials list below which includes prices, and additionally, our material origins.
Urbanite (concrete
chunks): construction sites, calling local
construction companies, looking for piles around town (ask before you
take). Not much preparation is needed after you've harvested your
urbanite. You may want to get a small sledge hammer to shape the chunks
just the way you want.
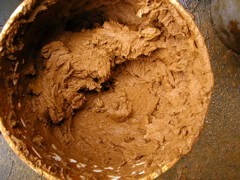
Clay: It is best to dig on site. You can dig up some clayish soil from below the topsoil in your yard and give it the "E-Z soil analysis test" here. Grate the clay on a heavy duty screen (1/2") to help break it up before it is mixed in with your sand or straw. Raw clay is easily mixed with a paint mixer after it has been soaked in a bit of water for a while (though our mixing attachment did break after a while).
Sand: It is very important that you use river sand for construction with cob, beach sand is too smooth. You can get sand directly from the river, however try to minimize your impact to the river bank. You can also buy sand from construction companies that sell gravel. You want about 1/4 inch or smaller. We used varying sized screens (as seen below) to filter the sand to different sizes we wanted. Larger pieces of sand and gravel are welcome in the foundation to be used as fill. Medium pieces are good to mix with your clay. The finest sand is used for laying the fire brick and for a fine plaster coating.
Straw: Usually you buy it unless you know
someone in the bailing business. We bought organic rice straw for $5.00 a
bale and needed about 2 bales.
Manure: A good ingredient in the
plaster. Get from fields with permission. Call local stables for horse
manure or dairy/meat farms for cow manure. Do not trespass on
fields!
Fire Brick: Unless you find it somewhere creative, we suggest buying it from a place that sells brick and building materials. The bricks will assembled into a floor for your oven so it is important that your brick resource has kept the bricks clean and free from things you may not want eat later (such as chemicals). Others have also suggested building oven floors out of large pieces of stone such as slate. More about Fire Brick in the Oven Floor Section.

John mixes clay with a paint mixer Clay mixed in a bucket Liz sifts sand with a screen
|
Item # |
Material |
Quantity |
Est. Cost |
Actual Cost |
Obtained From |
|
1 |
Build Your Own Earth Oven by Kiko Denzer |
1 |
$10.17 |
Free |
CCAT Library |
|
2 |
Paper, Pens, Pencils for planning |
Enough |
$5 |
Free |
On Hand |
|
3 |
Digital Camera for documenation |
1 |
$100 |
Free |
Liz |
|
4 |
Measuring Tape |
2 |
$10 |
Free |
CCAT ToolShed |
|
5 |
Running Water |
Lots |
$20 |
Free |
CCAT Budget |
|
6 |
Large Clay Sifters 1/2" |
2 |
$15 |
Donated |
Kiva |
|
7 |
Medium Sand Sifters 1/4" |
2 |
$15 |
Free |
CCAT ToolShed |
|
8 |
Small Sand Sifter 1/8" |
1 |
$8 |
Free |
CCAT ToolShed |
|
9 |
Small Sand Sifter 1/8" |
1 |
$8 |
Free |
CCAT Salvage |
|
10 |
Fine Sand Sifter 1/16" |
1 |
$8 |
Free |
CCAT Budget, and Salvage |
|
11 |
Wheel Barrows |
3 |
$60 |
Free |
CCAT ToolShed |
|
12 |
Shovels |
2 |
$20 |
Free |
CCAT ToolShed |
|
13 |
Five Gallon Buckets |
10 |
$20 |
Free |
CCAT ToolShed |
|
14 |
Scrap wood for construction of sifters and misc. |
Some |
$10 |
Free |
CCAT Salvage |
|
15 |
Screws for construction of sifters |
40 |
$3 |
Free |
CCAT Salvage |
|
16 |
Power Drill (be careful) |
1 |
$40 |
Free |
CCAT ToolShed |
|
17 |
Paint Mixing attachment for mixing clay |
1 |
$15 |
Free |
CCAT ToolShed |
|
18 |
Unskilled Labor Hours |
300 |
$2,100 |
Free |
EWP's |
|
19 |
Baking Pans |
4 |
$10 |
Free |
CCAT Kitchen |
|
20 |
"Sticky" Sand |
4 ft^3 |
$20 |
Free |
CCAT Resources |
|
21 |
River Sand |
2 tons |
$50 |
Free |
Mason Donation |
|
22 |
Clay |
5 ft^3 |
$70 |
Free |
CCAT Resources |
|
23 |
Gravel Fill |
10 ft^3 |
$50 |
Free |
CCAT Resources |
|
24 |
Urbanite |
40 ft^3 |
$100 |
Free |
CCAT Resources |
|
25 |
Sledge Hammer for shaping Urbanite |
1 |
$20 |
Free |
CCAT ToolShed |
|
26 |
Fire Brick |
23 |
$24 |
$24 |
Mason |
|
27 |
Straw |
2 Bales |
$10 |
$10 |
The Mill |
|
28 |
Horse Manure |
5 gal |
$5 |
Free |
CCAT Resources |
|
29 |
Rubber Gloves for handling manure |
2 pairs |
$2 |
Free |
CCAT Kitchen |
|
30 |
Kitchen Oven |
1 |
$200 |
Free |
CCAT Kitchen |
|
31 |
Newspaper |
1 |
$0.50 |
Free |
LumberJack |
|
32 |
Pulp/Paper |
1 ft^3 |
$10 |
Free |
CCAT Recycle |
|
33 |
Thermal Layer Instructions Lamination |
1 |
$5 |
$5 |
Kinko's Copies |
|
34 |
Firewood |
Fair Amt. |
$12 |
Free |
CCAT Resources |
|
35 |
Matches |
A box |
$1 |
Free |
CCAT Kitchen |
|
36 |
Skill saw |
1 |
$30 |
Free |
CCAT ToolShed |
|
37 |
Wood Saw |
2 |
$20 |
Free |
CCAT ToolShed |
|
38 |
Level |
2 |
$20 |
Free |
CCAT ToolShed |
|
39 |
Chalk |
1 |
$1 |
Free |
CCAT ToolShed |
|
40 |
String for drawing circle |
1 |
$1 |
Free |
Came with the straw |
|
43 |
Total Costs |
$3,128.67 |
$39 |
CCAT Budget and Donations | |
|
44 |
Estimated Total Savings |
$3,089.41 |
As you can see from the list, using donated/salvaged items can drastically reduce construction costs.
What's Next?
[La función Barra de exploración no está disponible en este Web]