Our foundation is made out of broken up concrete, or urbanite. The concrete is broken into large chunks usually about a foot square and four to six inches thick, this size is suitable for easy handling. Usually, urbanite has one side that is flat (the surface side) and one side that is rough (the side that was against the ground). We got our urbanite locally. Reusing concrete as urbanite is a great way to reduce embedded energy costs for many projects.
We started with outlining where our foundation would be on the bare patio and on the retaining wall using chalk. Our foundation would start out as a 5'x 5' square and be tapered up on all sides (except the side against the retaining wall). At the top it would end up being about a 4'x4' square, 30" off the ground. We chose 30" as our height because it would put our oven floor at a height comfortable to cook at.
Then we started laying out our urbanite. We took our larger pieces of urbanite and placed them flat side down on the patio, puzzling them into a square. After a tight square was laid out we filled the gaps in with rubble (gravel, sand, and broken glass) left over from other projects. Also, we laid about an inch of rubble over the gaps as a settling layer. We repeated this process with each layer.
In the second layer we laid the rough side of the urbanite against the rough side from the first layer, working them in until the flat side of the second layer was again level. We inset every subsequent layer about two inches in from the previous layer, except on the side against the retaining wall. We repeated this process of flat-to-flat and rough-to-rough and tapering in at the edges until we had seven layers of oven. At the top we inserted some longer pieces of urbanite which formed a small lip that overhangs the rest of the foundation. The lip is useful for hanging buckets to collect hot coals or for many other purposes.

It's also important to note that the pieces were laid like bricks, so that a whole piece of urbanite is laid over a gap between the two pieces below it. This can be tricky working in two dimensions, but possible.
Some of the urbanite pieces seemed kind of loose immediately after finishing the oven, but once it had some time to settle, get rained on, and have an oven set on it, most of the loose pieces seemed sturdier. Also Liz used some of the sand and clay mixture our class started to fill in some larger gaps.
On top of the last layer we laid a bed of fine sand. This is where we would next lay our firebricks for our oven floor.
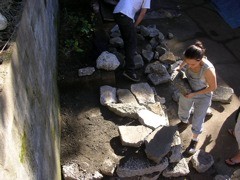
John inspects the first foundational layer
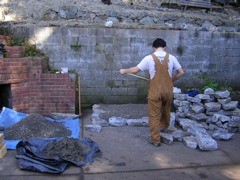
Michelle prepares to lay a piece of urbanite
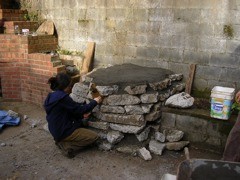
Liz applies a sand and clay mixture to the completed foundation