So you've got it all together - your materials and equipment, the people to help you, the project plans - time to start building right? Actually, it's time to start testing your materials. Liz and I sat down to come up with different test mixtures of sand and clay for the first layer of our oven. Our first layer won't contain a fiber material because the fiber would take up room in the thermal layer while doing little to increase the oven's strength.

Test Bricks bake in a Conventional Oven
Liz wanted to test the whole range of possible mixtures while I wanted to focus on the mixtures that were around 25% (1 part) clay, 75% (3 parts) sand. We ended up testing nine different ratios of sand to clay and selected the best one based on criteria below.
Testing the different possible ratios is important as materials are site specific. This means the clay or sand that we use may not have the same physical properties as clay or sand in other parts of the world (or county for that matter). Thus properties such as water absorbance, shrinkage, durability, and cracking affinity are different for each mixture and each specific type of clay and sand. There is no single formula to the best mixture, though good mixtures do tend to contain about 25% clay.
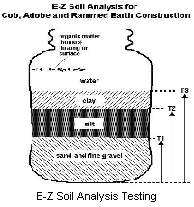
Want to know if your site has a
good soil composition for building with clay? Check out the easy soil
composition test.
With this in mind, it's important to keep your material as homogeneous as possible. For instance, you may consider mixing all of your clay together if you are only able to obtain exactly enough in quantity, but it is of several different types. Most of our clay was about the same in consistency relative to each layer.
Our first tests involved mixing the materials and forming them into bricks and then baking the bricks in a regular oven to speed the drying process. This can add a bit of error as most cob ovens will not be dried by being baked in a regular oven, but is mostly reliable and helps rule out some mixtures.
We formed each test brick into a 2” thick, 10” long, approx 5” wide loaf and placed it in a baking pan. We marked each loaf with a letter and recorded on our data sheet what mix ratio went with that letter. It is important to keep them in order and clearly marked while baking.
IT IS VERY EASY TO MIX UP WHICH LOAF IS WHICH RATIO, BE CAREFUL!!!
To bake them, we placed them in an oven at a low temperature (100º-150º F) and baked them with the door cracked, this took a few hours.
After the bricks were baked and dried we look them over. We inspected the bricks to see how much they shrank and cracked. Then we squeezed them to see how sturdy they were. It's important to note that we squeezed them as in a compression strength test and didn't bend them as in a stress point test. Not even concrete performs well in a stress point test. The best mix is one with minimal cracking and shrinking but provides the sturdiest compression strength.
Mostly, the bricks high in clay content shrank a little and had few cracks, but were soft to the touch. The bricks high in sand content didn't shrink too much but were full of cracks and brittle. For our tests it looks like brick B was the winner - 3 parts sand, 1 part clay. I thought it seemed a bit brittle in the test, but it worked out great in performance. Perhaps the oven baking added some error.
There are different tests for your mixture when creating a batch at your construction site to make sure your batch is on track. They involve listening to your mixture, and watching your mixture perform in a drop contest. You may consider keeping a small batch of premixed cob in a perfected ratio to listen to and to drop to compare to your large batch.
|
Brick |
Parts Clay |
Parts Sand |
Percent Clay |
Percent Sand |
Shrinkage |
Strength |
Cracking |
|
A |
1 |
4 |
20 |
80 |
Little |
Brittle |
High |
|
B |
1 |
3 |
25 |
75 |
Little |
Hard |
Moderate |
|
C |
1 |
2 |
33 |
66 |
Little |
Hard |
High |
|
D |
2 |
3 |
40 |
60 |
Med |
Hard |
Low |
|
E |
1 |
1 |
50 |
50 |
Med |
Firm |
Low |
|
F |
3 |
2 |
60 |
40 |
Med |
Soft |
Low |
|
G |
2 |
1 |
66 |
33 |
High |
Soft |
Med |
|
H |
3 |
1 |
75 |
25 |
High |
Very Soft |
Med |
|
I |
4 |
1 |
80 |
20 |
High |
Very Soft |
Med |
Once we were prepared with all the proper equipment and materials, we could finally start building.